- Inline iFrame Embed
- Floating Chat bubble
Step 1: Create your SketricGen account
To get started with the integration, sign in to your SketricGen account. If you don’t have an account yet, you can create one for free. Once you’re logged in, begin setting up your agent workflow by uploading your data sources. These can include files, text snippets, websites, or Q&A pairs, which will serve as the knowledge base for your agent. To get started with the integration, sign in to your SketricGen account. If you don’t have an account yet, you can create one for free. Once you’re logged in, begin setting up your agent workflow by uploading your data sources. These can include files, text snippets, websites, or Q&A pairs, which will serve as the knowledge base for your agent workflow.If you need assistance with setting up a working SketricGen agent workflow, refer to the step-by-step guide for creating and deploying your agent workflow. If you need assistance with setting up a working SketricGen agent workflow, refer to the step-by-step guide for creating and deploying your agent workflow.Step 2: Copy the SketricGen Agent Embed Code
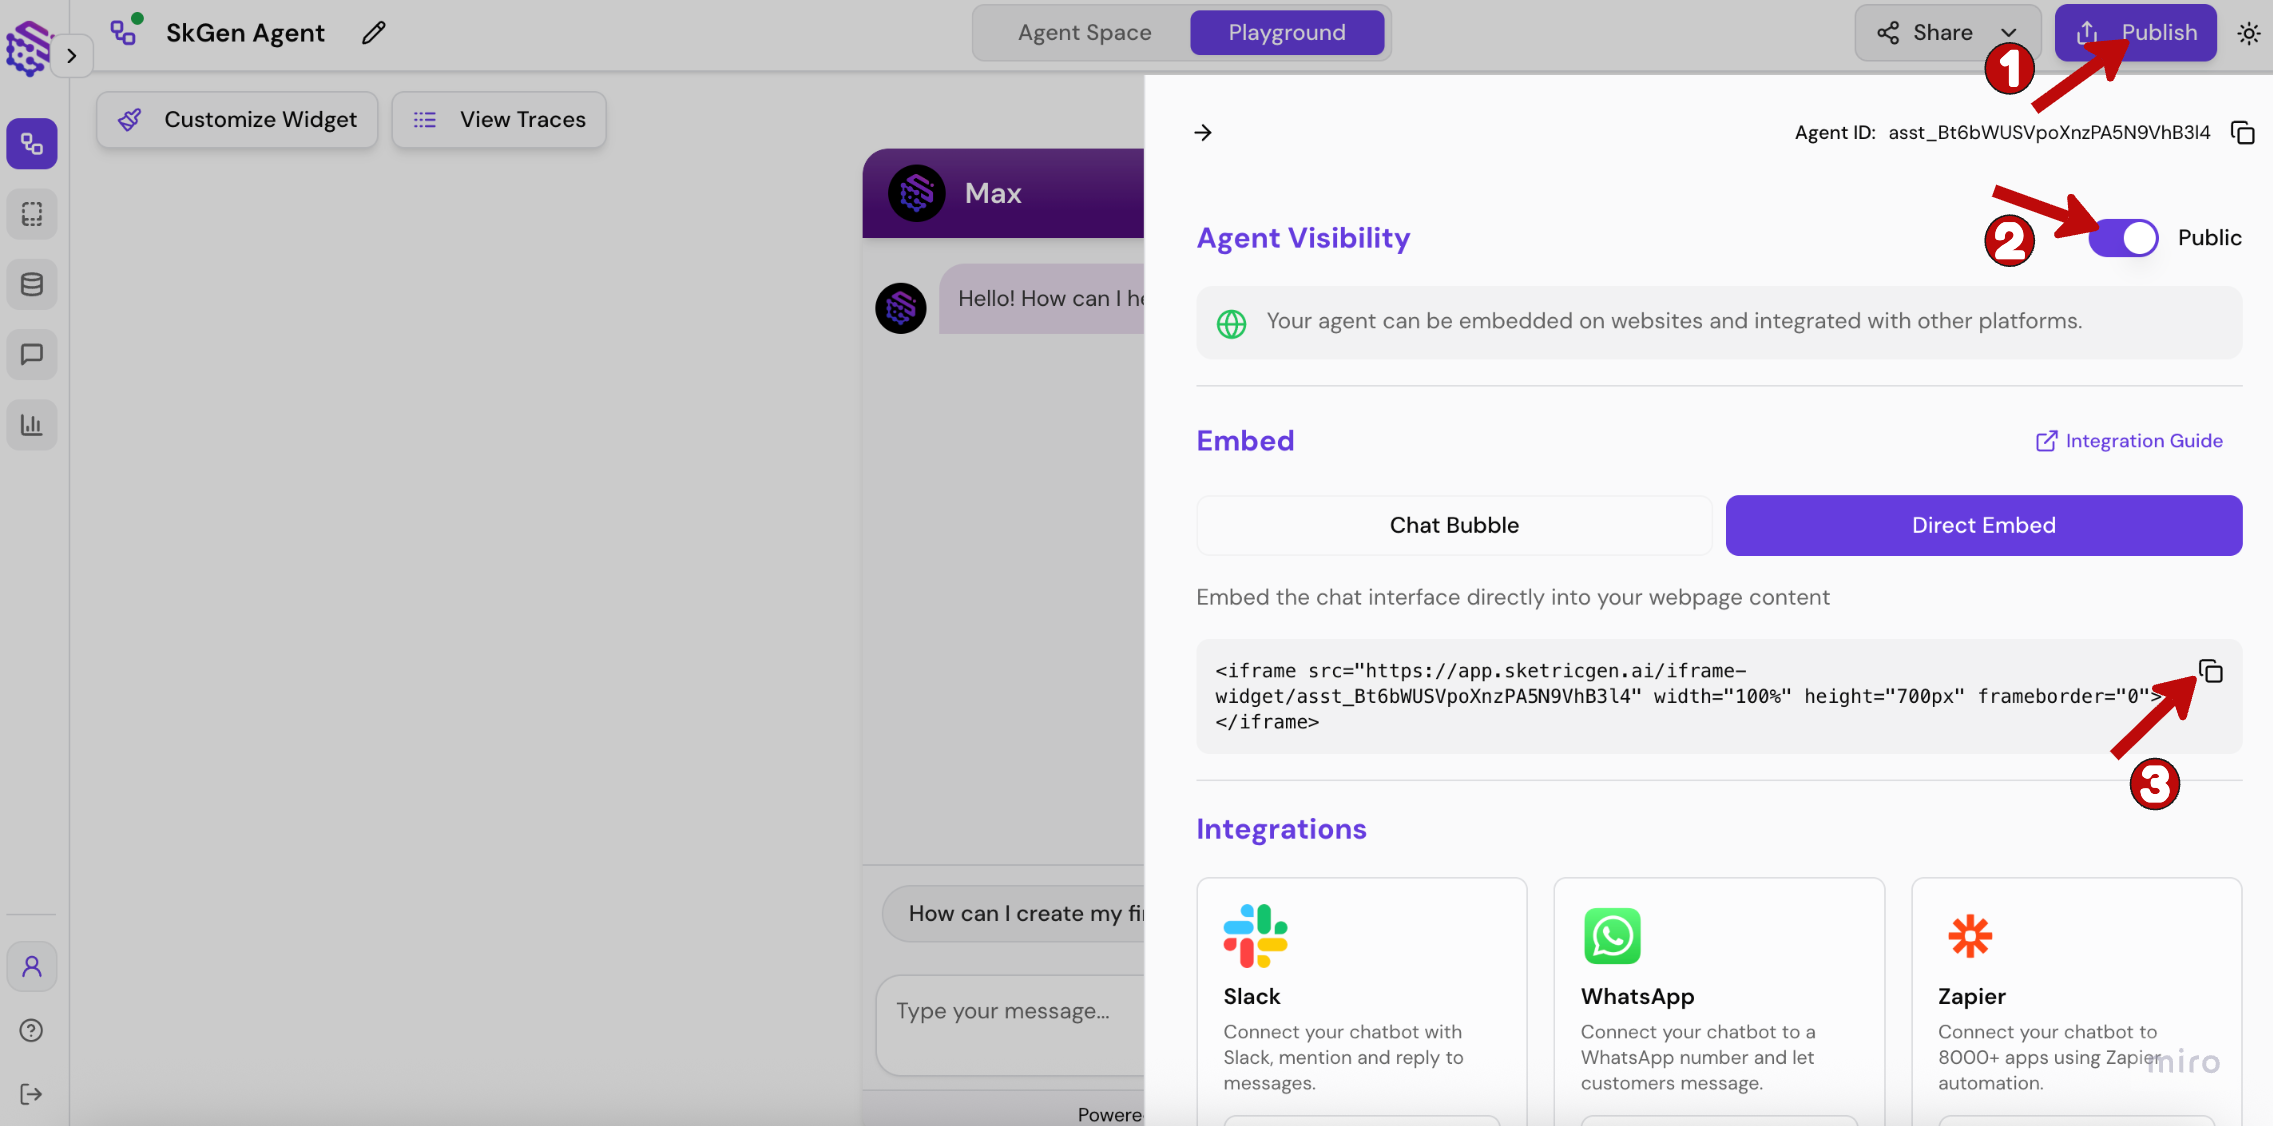
After configuring your agent workflow, go to your agent’s dashboard and click on Publish > Direct Embed to copy the iframe embed code. After configuring your agent workflow, go to your agent workflow’s dashboard and click on Publish > Direct Embed to copy the iframe embed code.Note: Ensure your agent is set to Public to make it accessible on your Shopify website. Note: Ensure your agent workflow is set to Public to make it accessible on your Shopify website.
Step 3: Sign into your Shopify website and embed your agent
Step 3: Sign into your Shopify website and embed your agent workflow
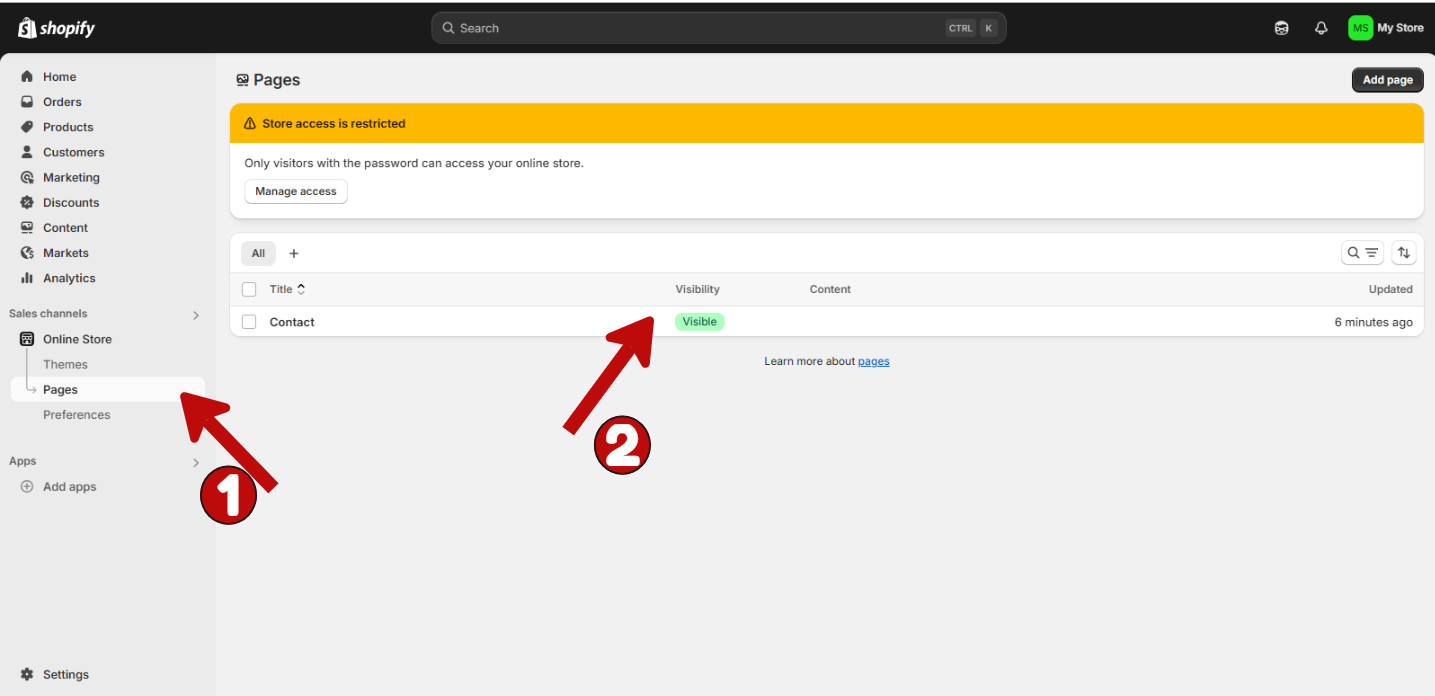
1. Log into your Shopify admin dashboard.
2. From the left-hand menu, go to Online Store → Pages.
3. Choose the page you want to edit. (In this example, we’re embedding the agent on the Contact page.)
3. Choose the page you want to edit. (In this example, we’re embedding the agent workflow on the Contact page.)
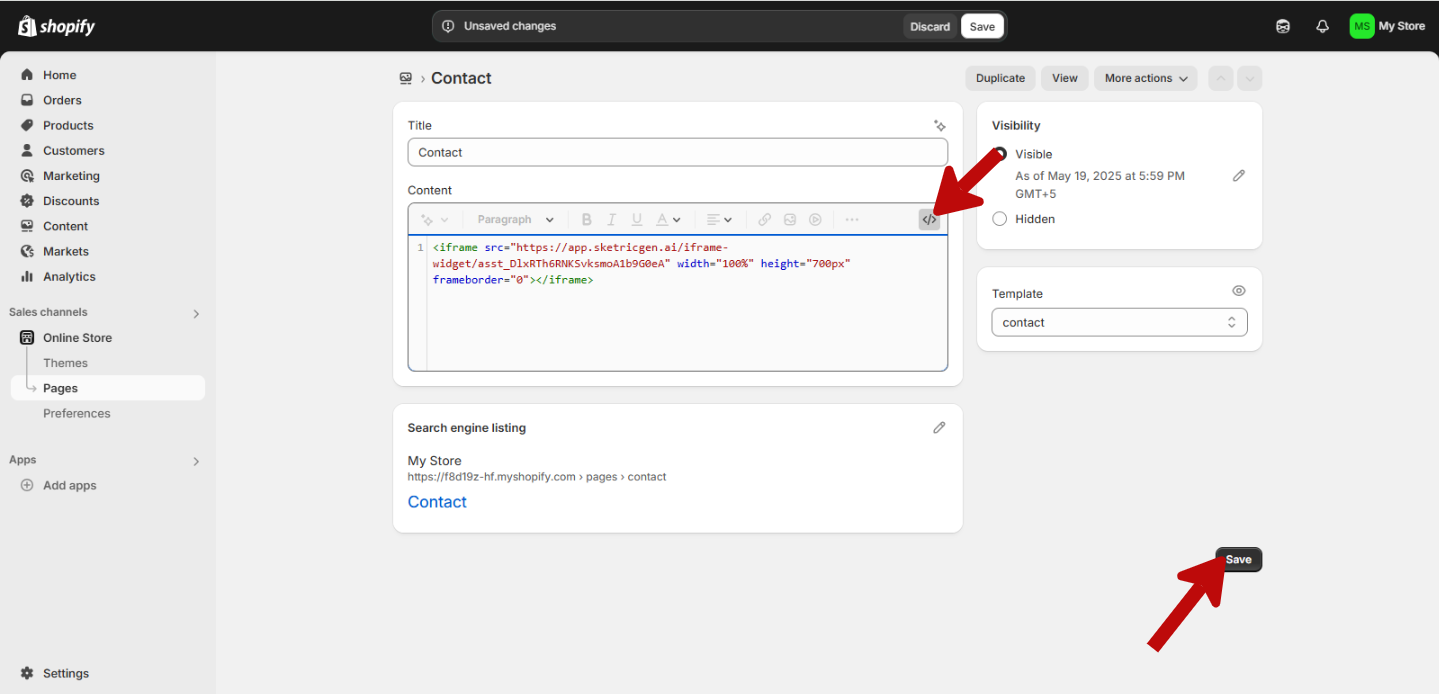
4. Paste the embed code into the HTML/code editor, then click Save.
Step 4: Test your widget after publishing
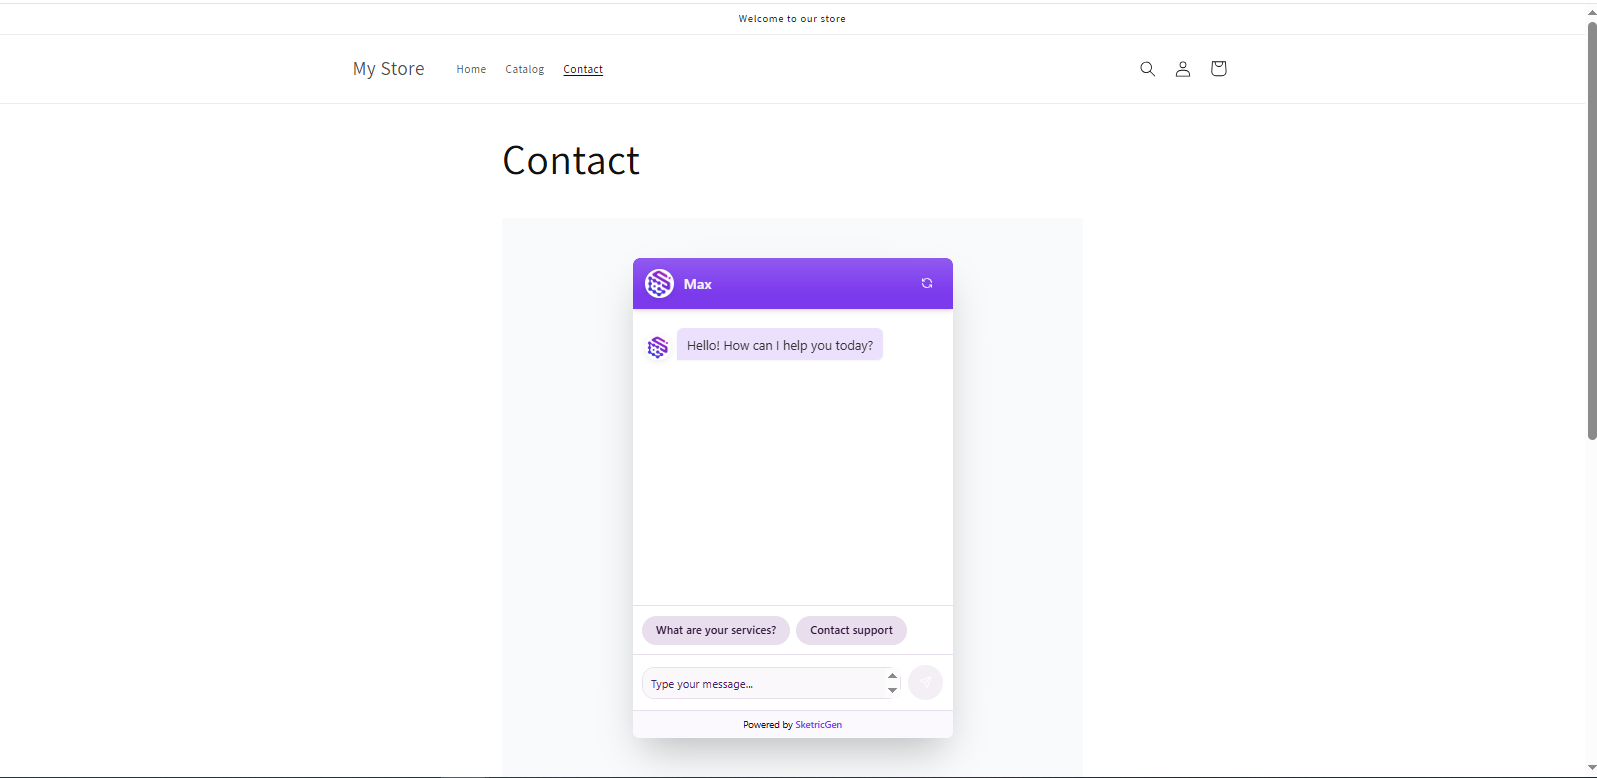
Your SketricGen Chat Widget is now successfully integrated into your Shopify site. Visitors can now chat with your AI agent and receive tailored responses.